
Chapter Objectives
- Obtain Intelligence Center level 1
- Talk to Mr. Kerman
- Wait for Mr. Kerman to reach out
- Talk to Prapor
- Talk to Mr. Kerman
- Locate the camp of Prapor's people on Lighthouse
- Find any clues about Prapor's people's intentions
- Talk to Mr. Kerman
- Talk to Lightkeeper
- Gain access to Lightkeeper
- Stay on good terms with Lightkeeper
- Obtain 3 TerraGroup "Blue Folders" materials
- Bring the found items to Lightkeeper
- Launch a yellow signal flare in front of ULTRA's main entrance on Interchange
- Eliminate any 15 targets in one raid on Interchange
- Talk to Lightkeeper
- Unlock the armored case
- Obtain the "Ticket"
- Ask Mechanic for help
- Obtain the Experimental signal jammer
- Gain access to The Lab (optional)
- Obtain the TerraGroup Labs access keycard (optional)
- Use the Experimental signal jammer to unlock the case
- Read the instructions from the armored case
- Contact Mr. Kerman
- Accept Mr. Kerman's offer
- Activate the RFID card from the case
- Obtain Solar Power level 1 (optional)
- Obtain a Blank RFID keycard (optional)
- Obtain the Laboratory master pass
- Use the Laboratory master pass to activate Kruglov's keycard
- Gain access to The Lab (optional)
- Obtain an RFID card encryption device
- Talk to Mr. Kerman
- Talk to Mechanic
- Wait for a response from Mechanic
- Hand over 40 Physical Bitcoins to Mechanic
- Obtain Bitcoin Farm level 1 (optional)
- Obtain 40 Physical Bitcoins to pay for Elektronik's services (optional)
- Collect the RFID card encryption device to activate Kruglov's keycard
- Gain access to Streets of Tarkov (optional)
- Access Kruglov's apartment on Streets of Tarkov (optional)
- Arrive at the entrance pathway to the port Terminal
- Swipe the keycard at the intercom reader
- Arrive at the entrance pathway to the port Terminal
- Swipe the keycard at the intercom reader
- Talk to Prapor
- Hand over the cash to Prapor
- Collect the required amount in RUB: 300, 000, 000 (optional)
- Hand over the cash to Prapor
- Collect the required amount in RUB: 500, 000, 000 (optional)
- Complete all Prapor's tasks in time
- Convert the evidence folders to digital format and save them to an SSD
- Obtain the item: Folder with TerraGroup Labs evidence (Reports) (optional)
- Obtain the item: Folder with TerraGroup evidence (Staff) (optional)
- Obtain the item: Folder with TerraGroup Labs evidence (Developments) (optional)
- Obtain the item: Folder with TerraGroup evidence (Finances) (optional)
- Eliminate any 50 targets on Streets of Tarkov
- Eliminate 4 PMC operatives in one raid
- Report to Prapor
- Hand over Secure container Kappa to Prapor
- Talk to Mr. Kerman
- Agree to find dirt on TerraGroup for Mr. Kerman
- Obtain Intelligence Center level 3
- Don't waste the second chance from Mr. Kerman
- Deliver the 8 major TerraGroup evidence to Mr. Kerman
- Deliver the 36 minor TerraGroup evidence to Mr. Kerman (optional)
- Negotiate with Mr. Kerman
- Confirm with Mr. Kerman that all the evidence has been delivered
- Wait for Mr. Kerman's trusted contact to get in touch
- Talk to Fence
- Reach 4.0 reputation with Fence
- Complete Fence's assignments
- Keep the standing with Fence above 4.0
- Extract through the Friendship Bridge (Co-Op) on Woods
- Extract through the Scav Lands (Co-Op) on Reserve
- Reach 0.4 standing with BTR Driver
- Tell Fence that the assignment is complete
- Obtain Solar Power level 1
- Ask the traders how to leave Tarkov
- Hand over the military flash drive with compiled data to Lightkeeper
- Record the compiled data to a military flash drive (optional)
- Obtain the topographic intel documents on Lighthouse (optional)
- Obtain the topographic intel documents on Woods (optional)
- Obtain the topographic intel documents on Customs (optional)
- Obtain the topographic intel documents on Ground Zero (optional)
- Obtain the topographic intel documents on Factory (optional)
- Eliminate 30 PMCs on Woods
- Hand over 100 PMC dogtags to Lightkeeper
- Obtain 100 PMC dogtags (optional)
- Stash the first amulet in the marked room on Lighthouse
- Obtain the amulet from the marked room on Customs (optional)
- Stash the second amulet in the marked room on Lighthouse
- Obtain the amulet from the first marked room on Streets of Tarkov (optional)
- Stash the third amulet in the marked room on Lighthouse
- Obtain the amulet from the second marked room on Streets of Tarkov (optional)
- Stash the fourth amulet in the marked room on Lighthouse
- Obtain the amulet from the first marked room on Reserve (optional)
- Stash the fifth amulet in the marked room on Lighthouse
- Obtain the amulet from the second marked room on Reserve (optional)
- Stash the sixth amulet in the marked room on Lighthouse
- Obtain the amulet from the third marked room on Reserve (optional)
- Report to Lightkeeper
- Talk to Mr. Kerman
- Ask the traders how to leave Tarkov
- Complete Prapor's tasks
- Hand over any military or advanced electronics to Prapor
- Obtain any 50 military or advanced electronics (optional)
- Hand over Secure container Theta, Epsilon or Kappa to Prapor
- Obtain Secure container Kappa (optional)
- Obtain Secure container Epsilon (optional)
- Obtain Secure container Theta (optional)
- Hand over 40 weapon and armor repair kits to Prapor
- Obtain 40 weapon and armor repair kits with full durability (optional)
- Hand over Case with dangerous cargo to Prapor
- Locate and obtain the Case with dangerous cargo (optional)
- Report to Prapor
- Hand over 1, 000, 000 Dollars to Prapor
- Collect the required amount in USD: 1, 000, 000 (optional)
- Wait for the info from Prapor
- Collect the updated hash codes from Prapor
- Obtain Solar Power level 1
- Arrive at the entrance pathway to the port Terminal
- Bring the Reprogrammed RFID keycard with Mr. Kerman's hash codes (optional)
- Bring the Reprogrammed RFID keycard with Prapor's hash codes (optional)
- Bring the RFID keycard with unknown name (optional)
- Bring the Prapor's letter for the port checkpoint (optional)
- Swipe the keycard at the intercom reader
- Access the port Terminal
- Bring the Secure container Alpha-1 with TerraGroup evidence (optional)
- Pass the security check
- Escape from Tarkov
- Locate the armory with the confiscated equipment (optional)
- Retrieve the Secure container Alpha-1 (optional)
- Obtain the keycard to unlock the service passage (optional)
- Locate the exit leading to the Terminal loading zone (optional)
- Unlock the service passage inside the seaport building (optional)
- Access the Terminal loading zone (optional)
- Locate the way into the fuel depot (optional)
- Figure out how to restore power to the pumping station (optional)
- Obtain the diagram of the electrical panels (optional)
- Drain the water in the pumping station (optional)
- Obtain the key to the gate blocking the road to the pier (optional)
- Locate the exit leading to the pier (optional)
- Reach the evacuation area at the pier (optional)
Step by Step
Jump to a step 10 steps
- 1Arrive at the entrance pathway to the port Terminal
- 2Access the port Terminal
- 3Pass the security check
- 4Locate the armory with your confiscated equipment
- 5Obtain the keycard to unlock the service passage
- 6Access the Terminal loading zone
- 7Locate the way into the fuel depot
- 8Drain the water in the pumping station
- 9Obtain the key to the gate blocking the road to the pier
- 10Escape from Tarkov
1Arrive at the entrance pathway to the port Terminal
Bring a valid access item to the intercom on the watchtower and run it through the keycard reader; for the Survivor ending, press the intercom call button instead, and only between 21:00 and 06:00. A recognised item is accepted and the voice on the intercom sends you on to the gate. Show up without one, or outside those hours, and the guard turns you away.
- Reprogrammed RFID keycard with Mr. Kerman's hash codes
- RFID keycard with unknown name
- Prapor's letter for the port checkpoint
- Reprogrammed RFID keycard with Prapor's hash codes

The location of the intercom on the map. 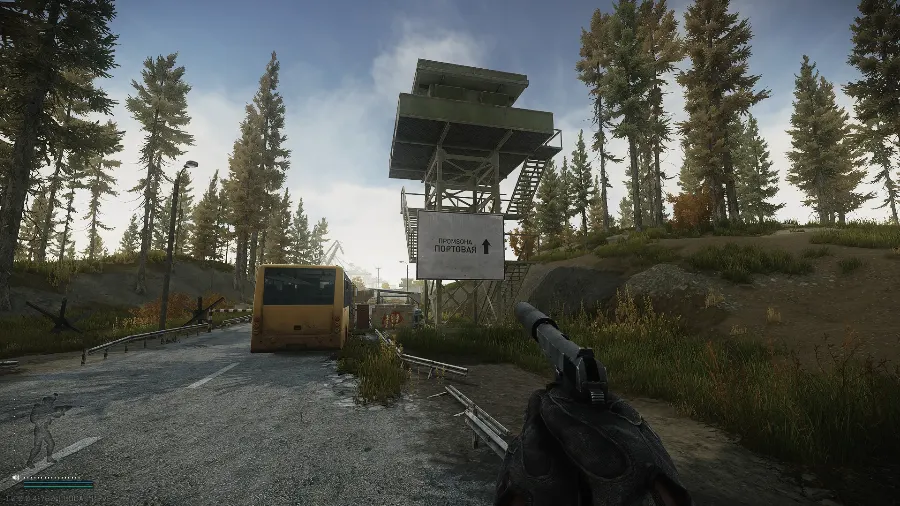
Watchtower where the intercom is located. 
The intercom where you need to swipe the keycard or use the call button for the Survivor ending. 2Access the port Terminal
Once you are cleared to come closer, take the left-hand road towards the transit area; your weapon is lowered for you as you reach it. On the Savior route you cannot transit unless Secure container Alpha-1 with TerraGroup evidence is in your task inventory. The port garrison will kill you for pushing past the first anti-tank barrier without presenting an access item, for stepping off the road around the transit area, or for drawing a weapon or taking one back in hand after it has been lowered. Note that dying with the Alpha-1 container simply gets you a replacement by in-game mail; Lightkeeper sells the RFID keycard with unknown name once per raid for 1x TerraGroup "Blue Folders" materials, which needs a free special slot; and Prapor sells his letter for the port checkpoint twice per trader reset at 5,000,000 Roubles.
- Secure container Alpha-1 with TerraGroup evidence

Get behind the blockade. 
Follow the road until you can switch to the left one. 
Get in the transit zone. 3Pass the security check
The check itself is just a cutscene of your character entering the Terminal area.
4Locate the armory with your confiscated equipment
Work your way to the armory building and go inside to reclaim your confiscated gear, picking up the Armory key somewhere along the route. After you have your equipment and leave the armory by the west side, a Black Division squad moves in on the building from the southwest, and you have to fight them off before the next objective opens.
- Armory key
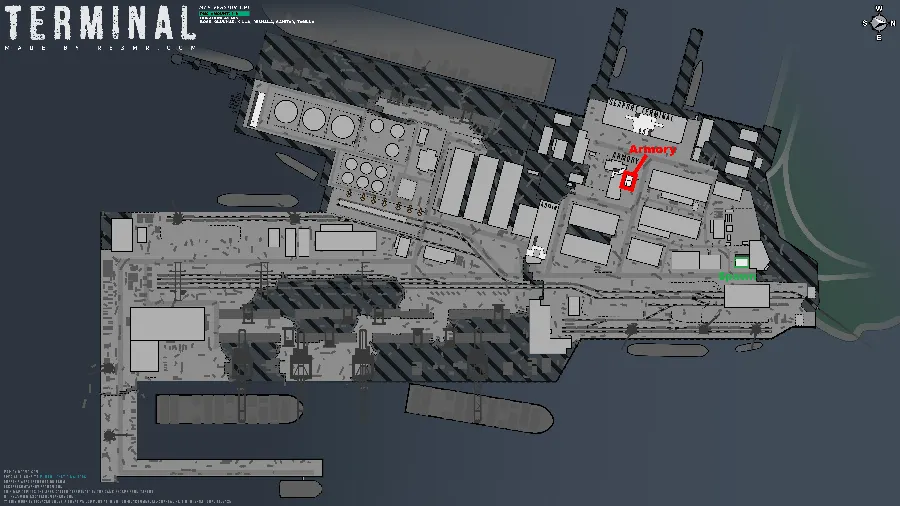
The location of the Armory on the map. 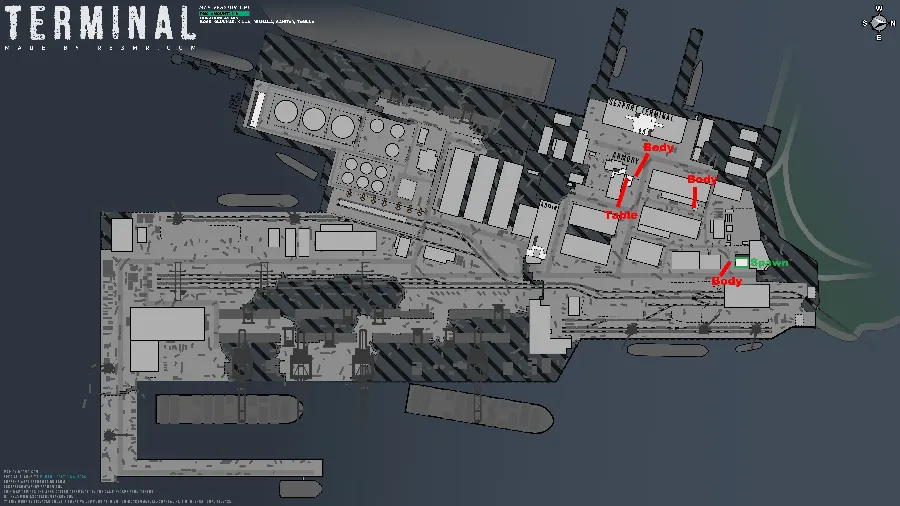
The armory key spawn locations. 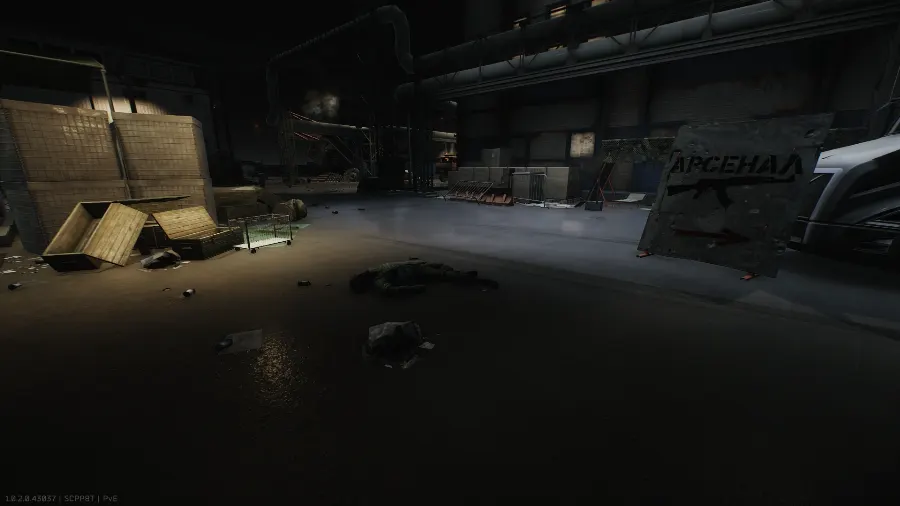
In the right hand of a dead RUAF soldier right outside the spawn building. 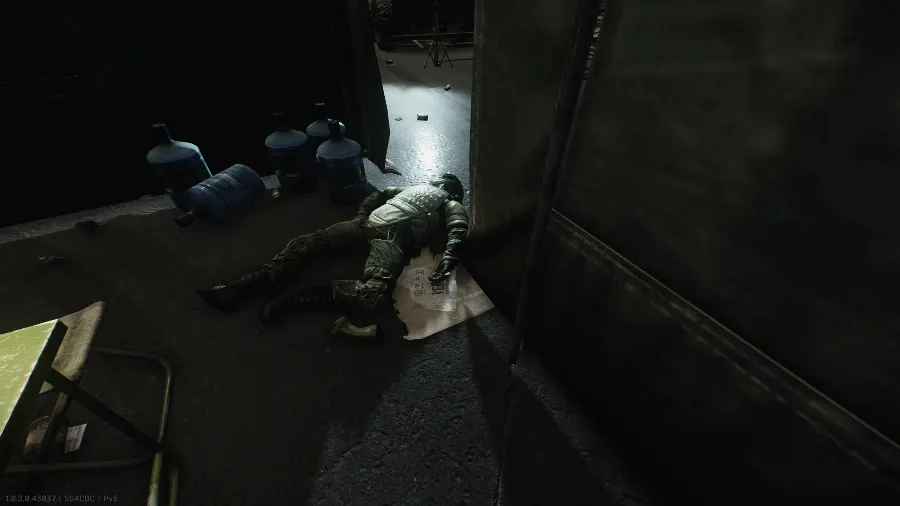
In the left hand of a dead RUAF soldier on the way to the armory. 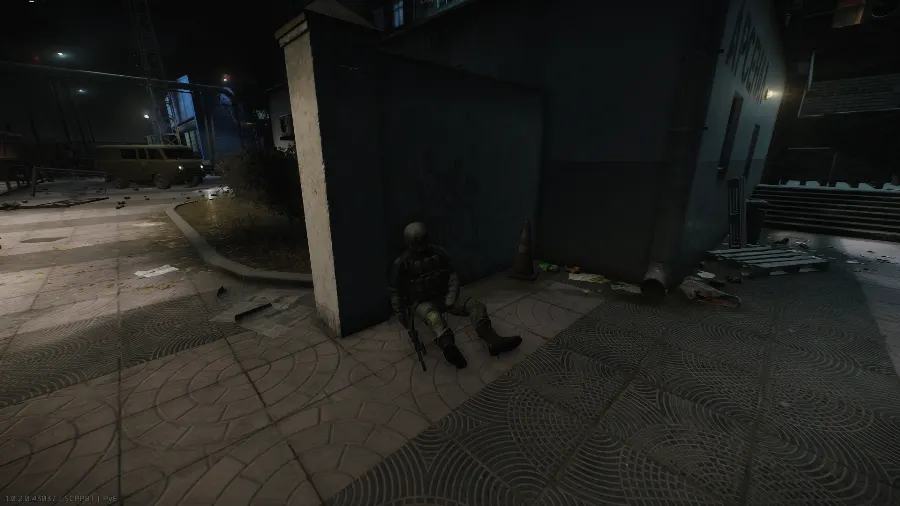
Inside a dead RUAF soldier outside of the armory building. 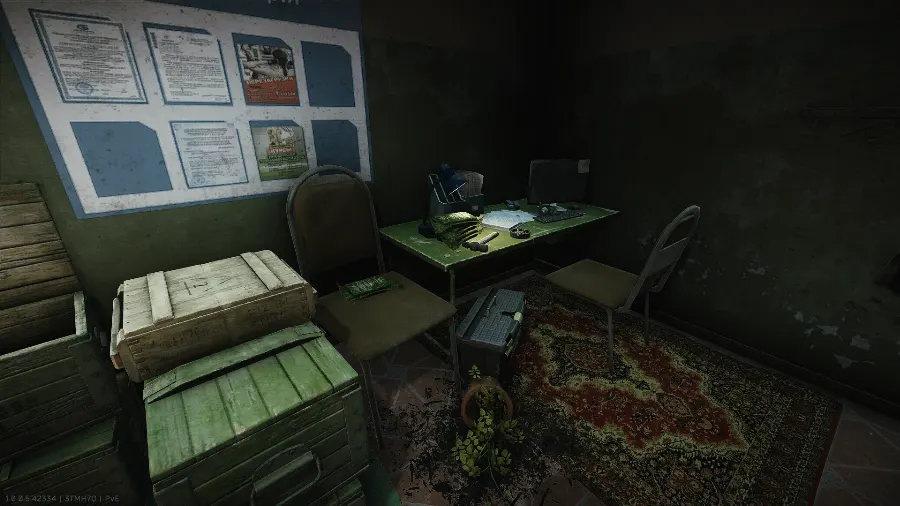
On a table inside the armory building. 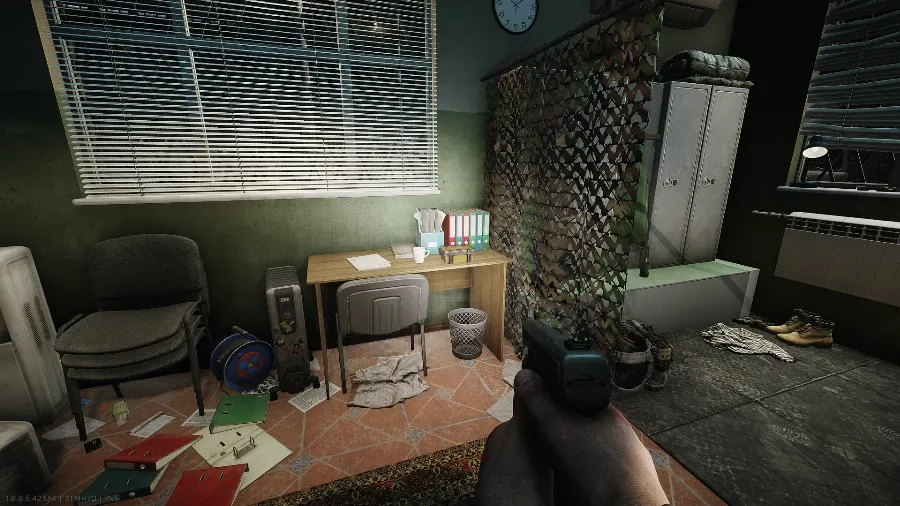
If you are doing the '''Savior''' ending route, you need to retrieve the Secure container Alpha-1 with TerraGroup evidence from the desk under the window inside the room. 
The equipment is in a random locker. 5Obtain the keycard to unlock the service passage
The Black Division keycard is inside the seaport Terminal building (MS), west of the armory. Clear the Black Division squad holding the interior first, then take the card from the Weapon box (5x2) sitting on a tipped-over ATM.
- Black Division keycard
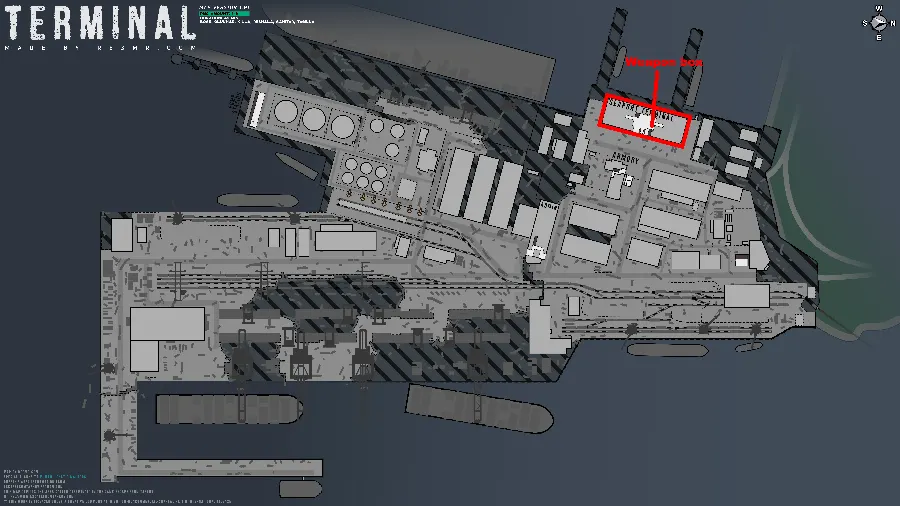
Building location marked on map. 
The seaport Terminal building (MS). 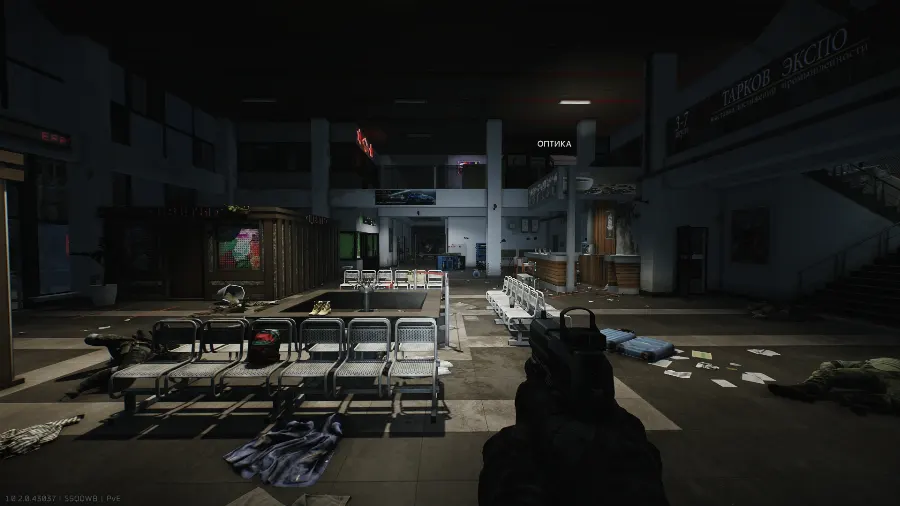
The weapon box inside the building. 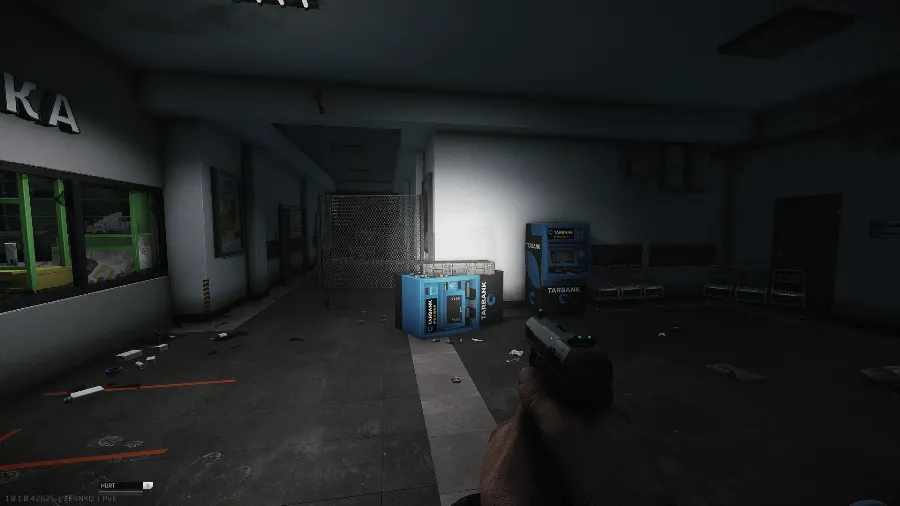
Inside the weapon box on an ATM. 6Access the Terminal loading zone
Reaching the loading zone means going through the admin building. Scavs will contest the approach and a Black Division team is posted at the entrance; with all of them down, step inside and swipe the Black Division keycard at the scanner beside the door. The hallway immediately past it holds scattered provisions and medical items, and Scavs spawning further on will try to push into it while you are inside.
- Black Division keycard
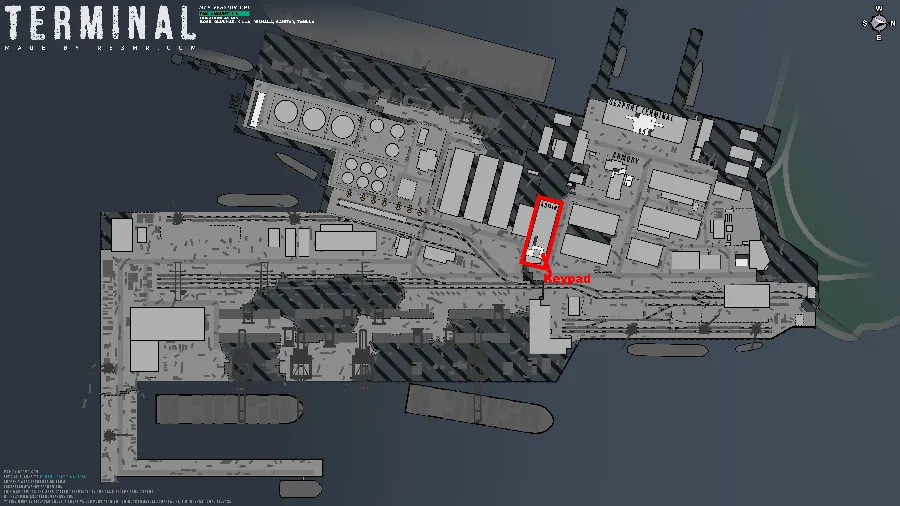
Building location marked on map. 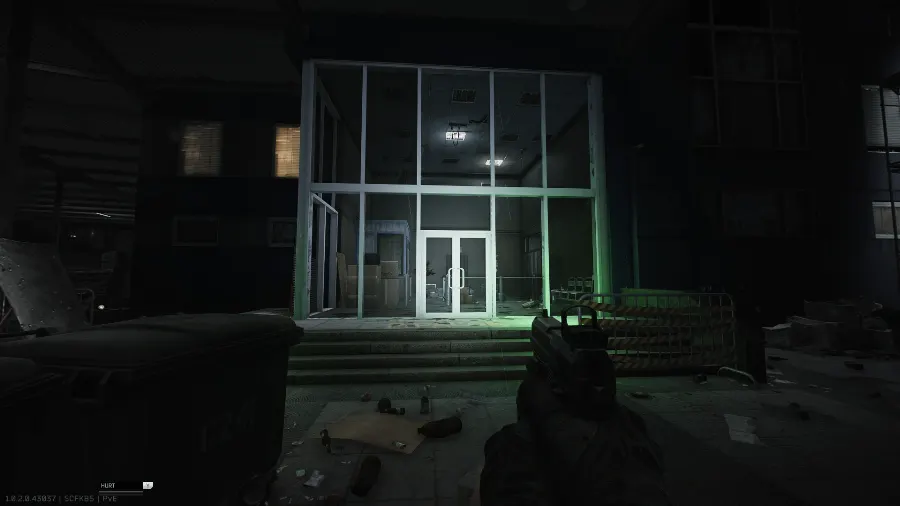
The building. 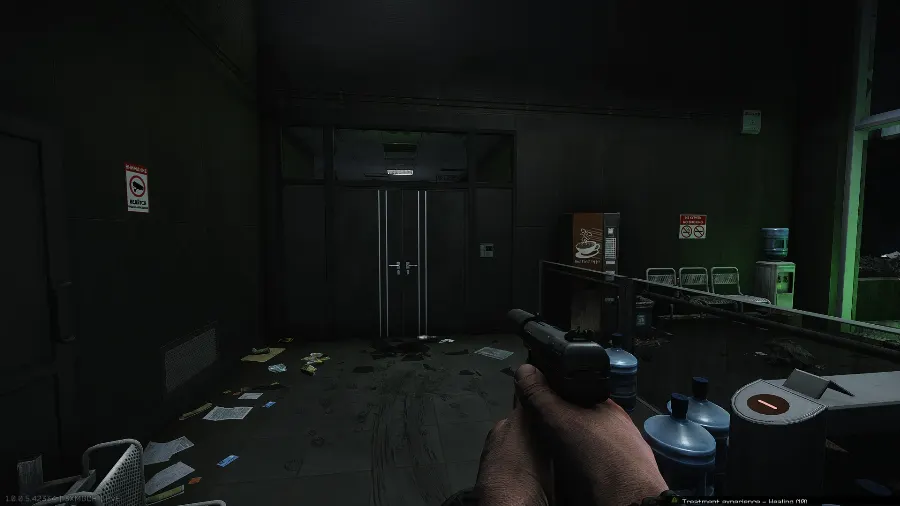
The door. 7Locate the way into the fuel depot
A metal gate stands in the way. Blow it open with an SZ-1 explosive charge found nearby, force it with Elite level Strength, or push it open alongside another player. Black Division soldiers hold the ground around the various SZ-1 spawns, so it is worth killing them before you go looking for a charge.
- SZ-1 explosive charge (Terminal)

Gate location marked on map. 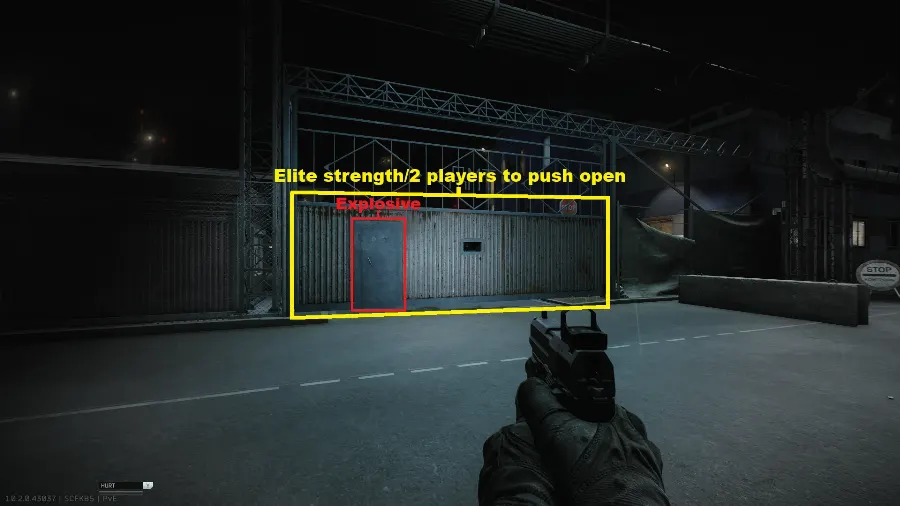
The gate. 
The location of the SZ-1 explosive charge (Terminal)|SZ-1 explosive charge on the map. 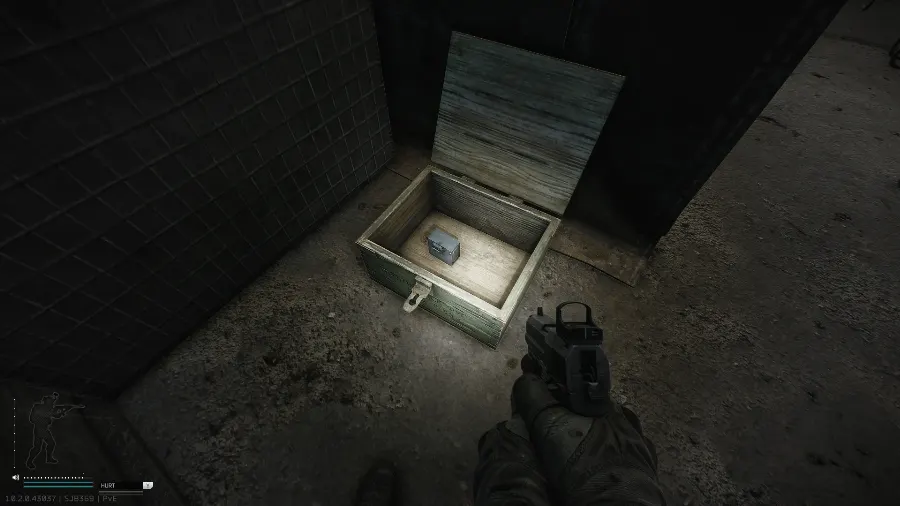
No. 1 - The explosive in an open crate. 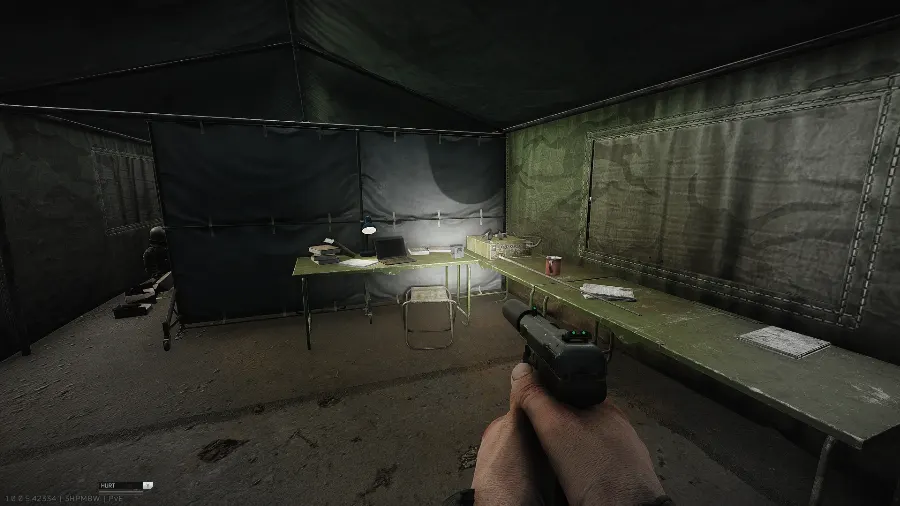
No. 2 - The explosive on a desk inside a tent. 
No. 3 - The explosive on some barrels. 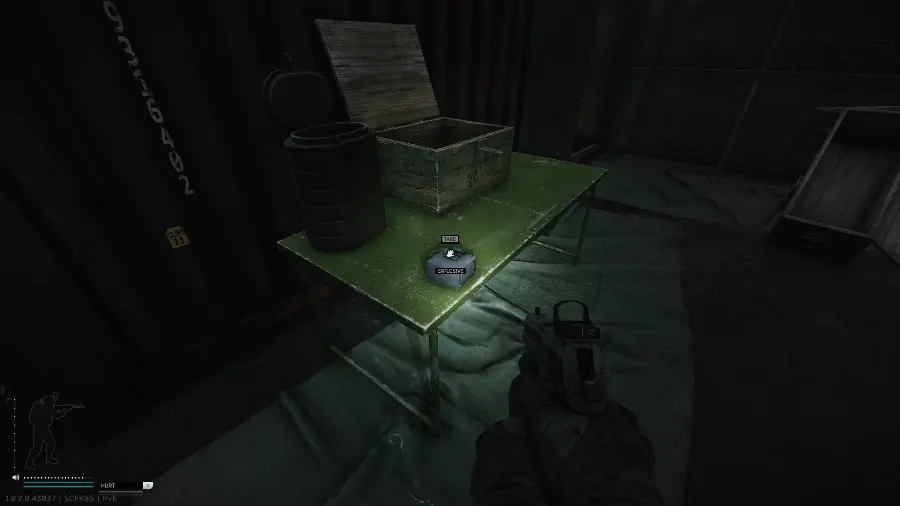
No. 4 - The explosive on a table. 
No. 5 - The explosive on some crates. 
No. 6 - The explosive on a desk under a canopy. 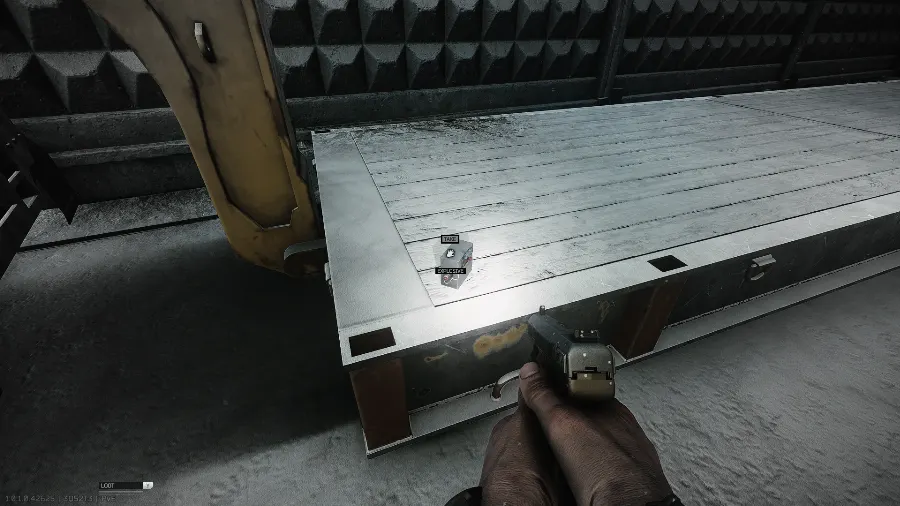
No. 7 - The explosive on the corner of a trailer. 8Drain the water in the pumping station
The pumping station needs power before it will drain, which means finding and repairing between one and five electrical panels dotted around Terminal. The count depends on the raid: solo players always get a single panel, either number 9 or number 10, while a raid of two to five players needs at least one and as many as five, spread across all the panel locations. You can repair a panel with bare hands, but the odds are poor and a failed attempt damages your arms. Two Toolsets sit at fixed spots on Terminal and spawn every raid.
- Toolset
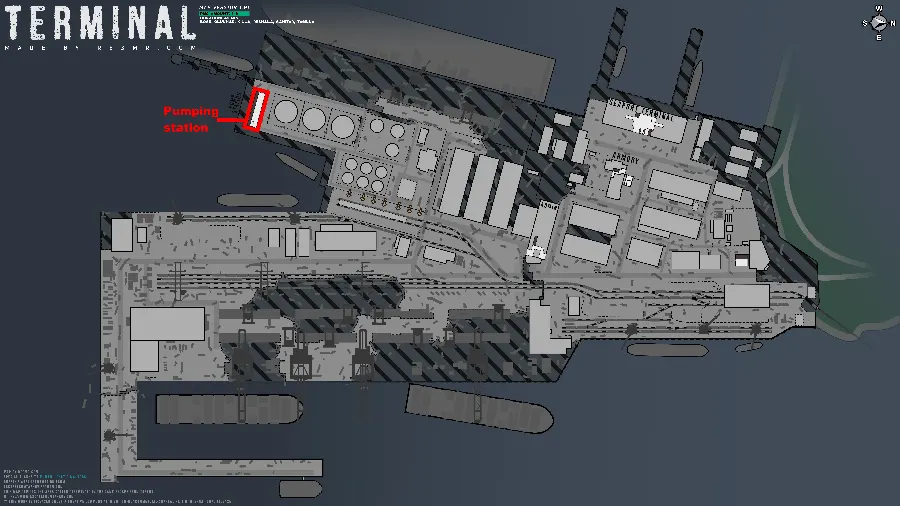
Pumping station location marked on map. 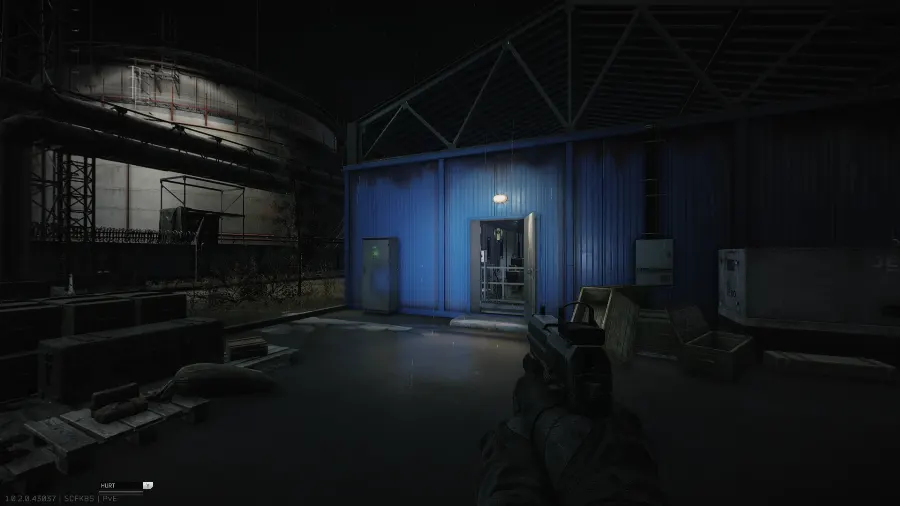
The pumping station. 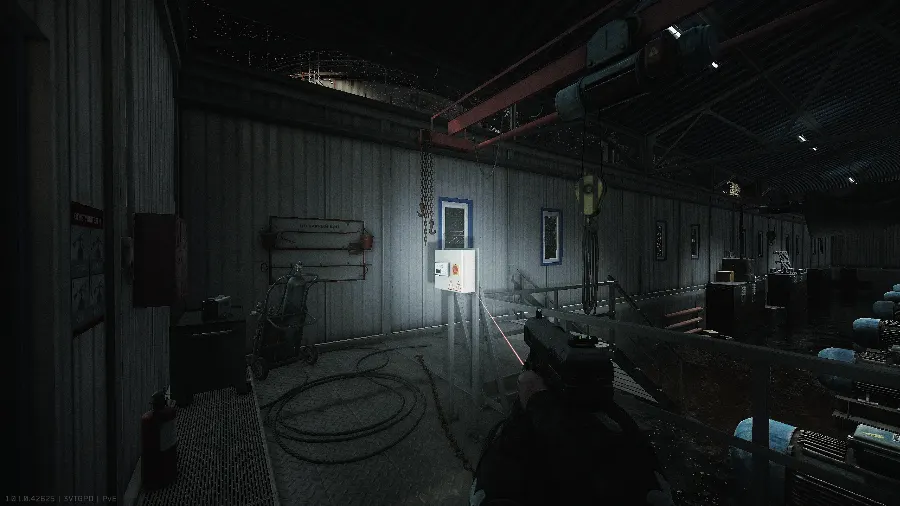
The pumping station button to drain the water. 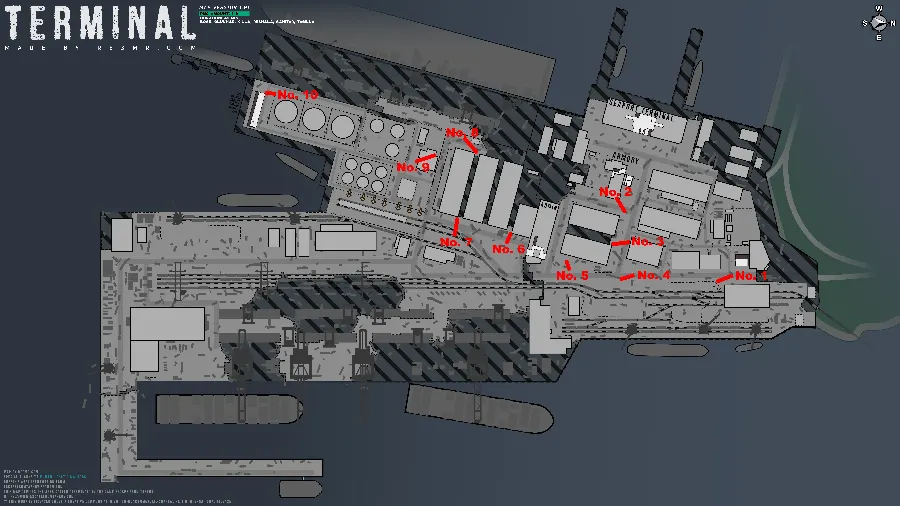
All locations of the electrical panels on the map. 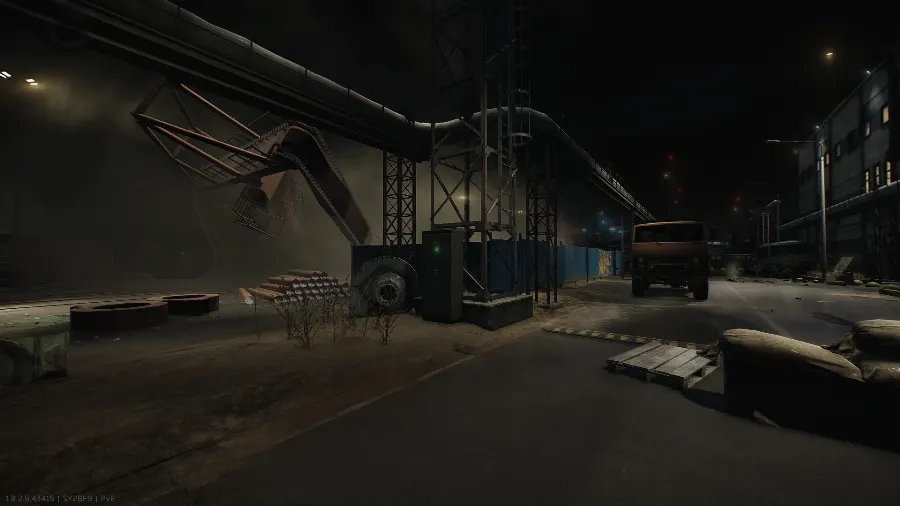
No. 1 - To the left out of the spawn room near the crane that collapses at the start of the raid. 
No. 2 - Next to a metal tower east of the armory. 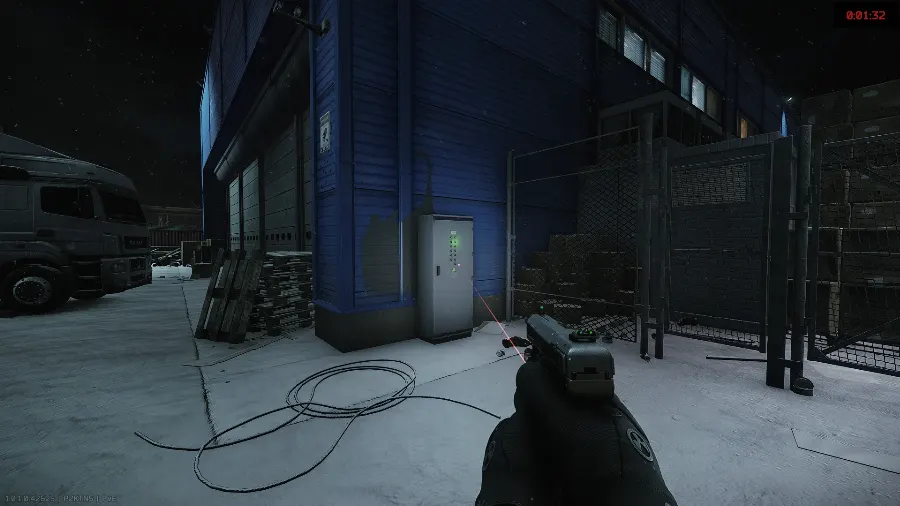
No. 3 - Outside of the alleyway between two large buildings east of the armory. 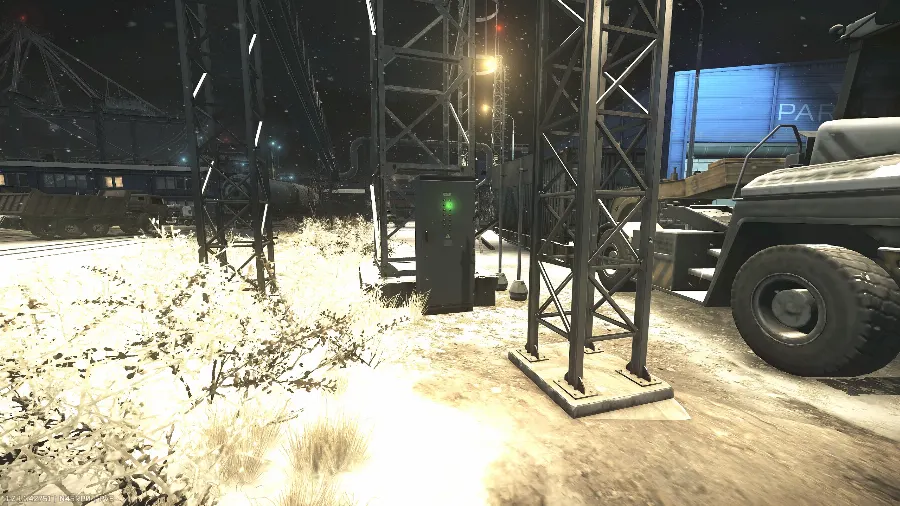
No. 4 - At the end of the road leading east from the armory next to two metal towers. 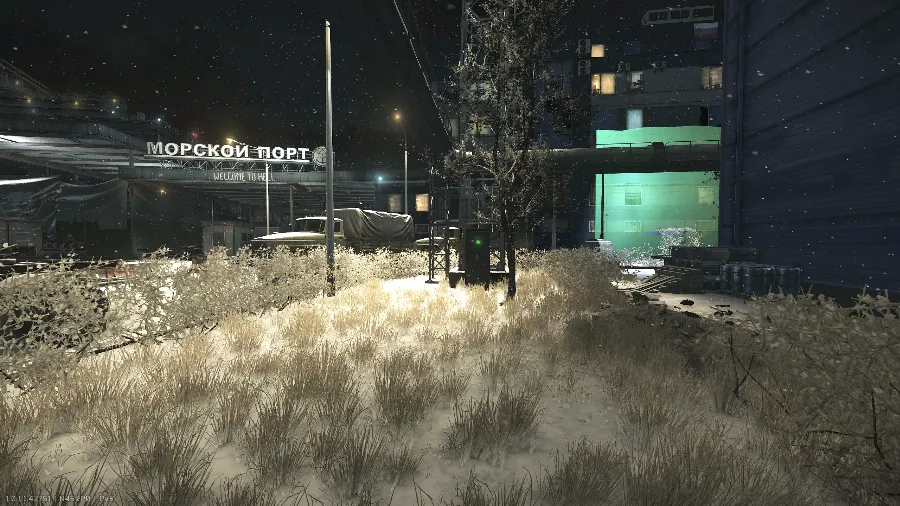
No. 5 - Next to a metal tower out front of the admin building (D3). 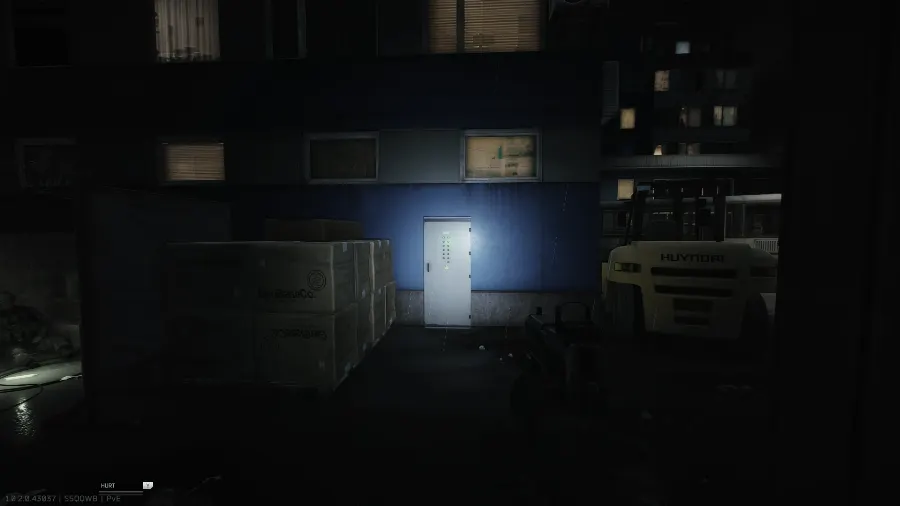
No. 6 - To the right up against the buildings just past where the Black Division keycard must be swiped. 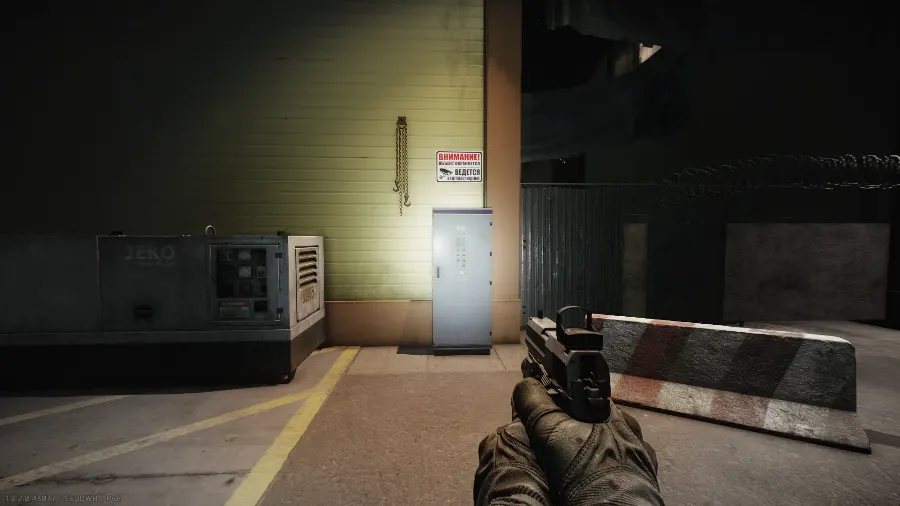
No. 7 - To the right up against the buildings past where the Black Division keycard must be swiped. 
No. 8 - Up against a metal tower in the area to the right down the road past the metal gate. 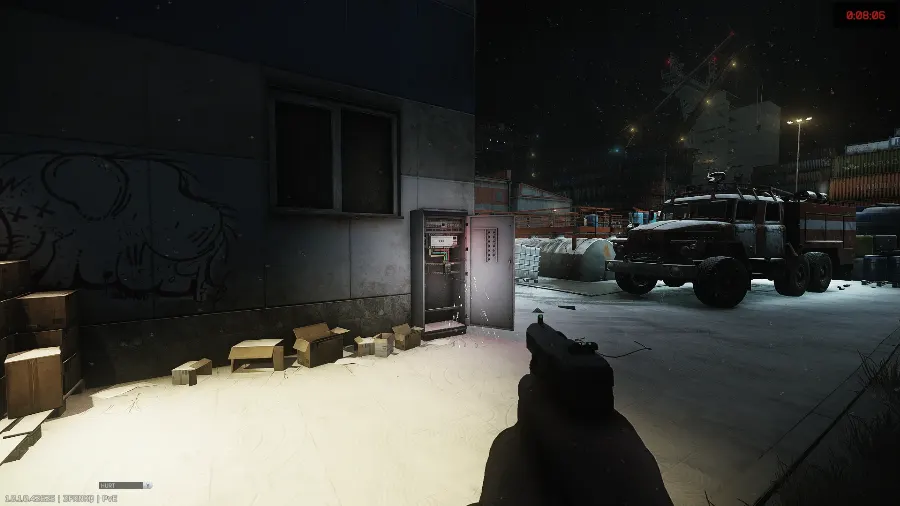
No. 9 - On the backside of the building to the right immediately past the metal gate tucked into a corner. 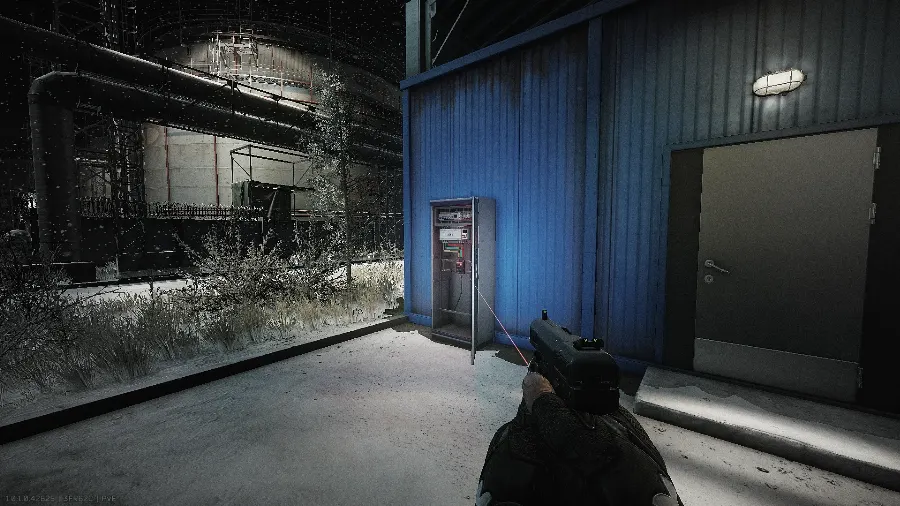
No. 10 - Right outside the door to the pumping station up against the building. 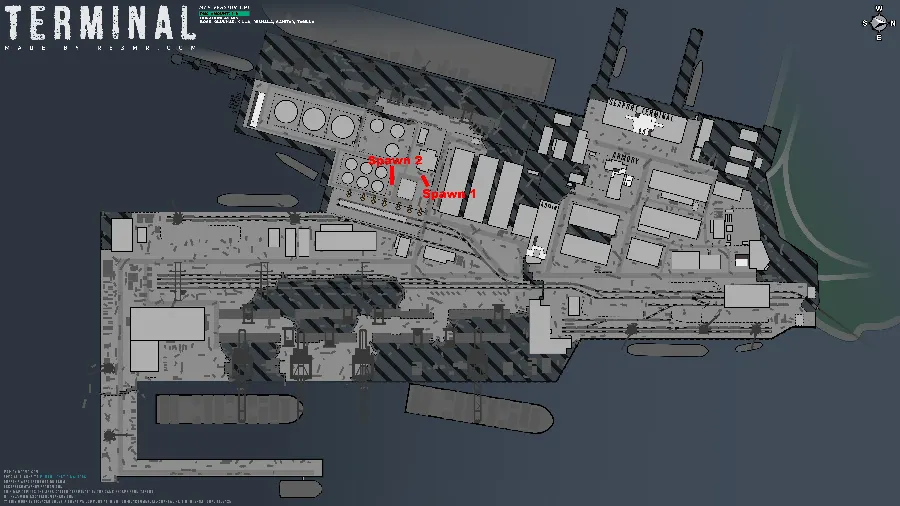
Toolset spawns marked on the map. 
In front of the BRDM after opening the metal gate, on a concrete barricade. 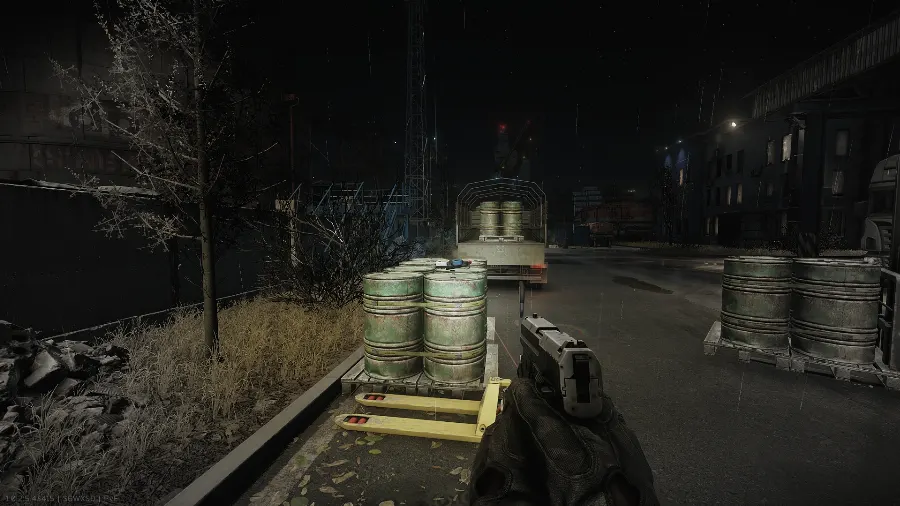
Next to the fuel pumps to the left after opening the metal gate, on a set of barrels. 9Obtain the key to the gate blocking the road to the pier
Once the water is gone, the key is in a safe inside the pumping station. From there you need to reach the pier for the Zubr Boat extraction, and three routes lead to the door. The eastern container loading bay (green) sidesteps the Scav Boss that can spawn, but means backtracking and a longer walk. The central bay (blue) is more direct but may pit you against that Scav Boss plus a Black Division team nearby. The western bay (purple), hugging the water, can also avoid the Scav Boss but risks a long-range fight with a Black Division squad at the far end. Every route has Black Division squads to get through before the pier door.
- Pier door key
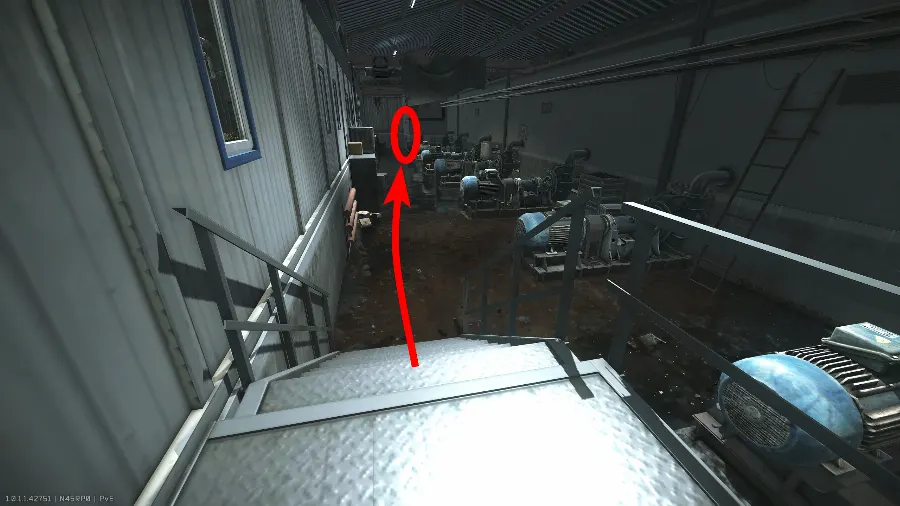
The room where the safe is. 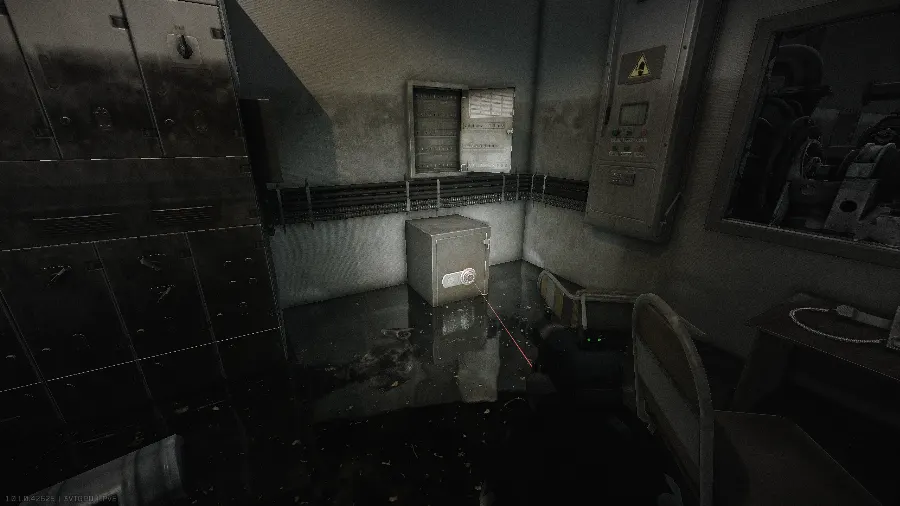
The safe. 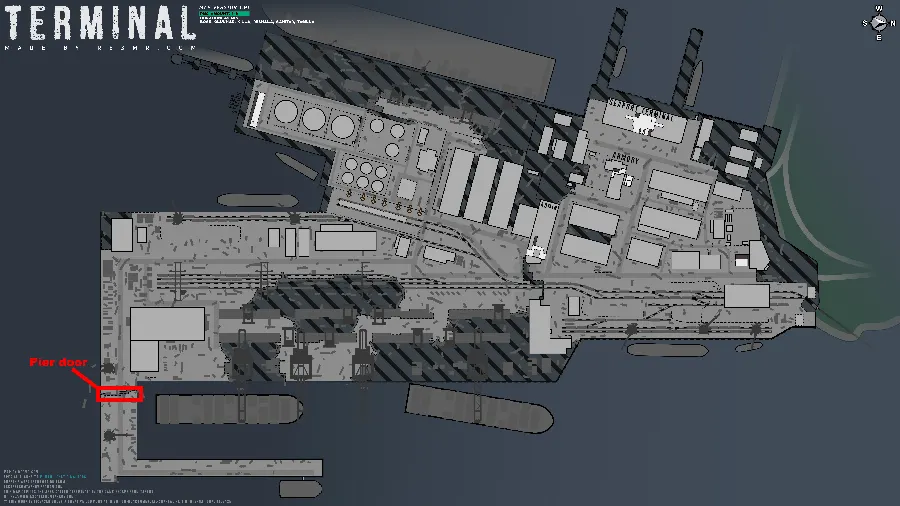
The pier door location on the map. 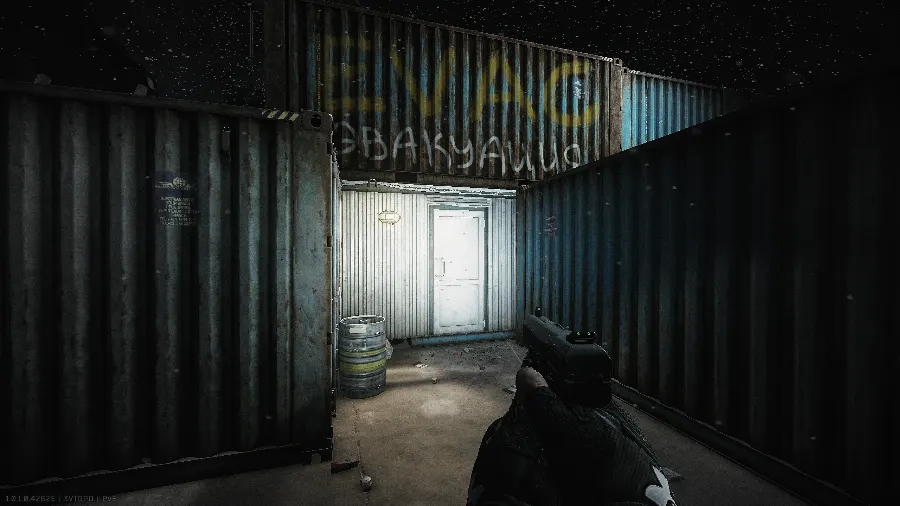
The door. 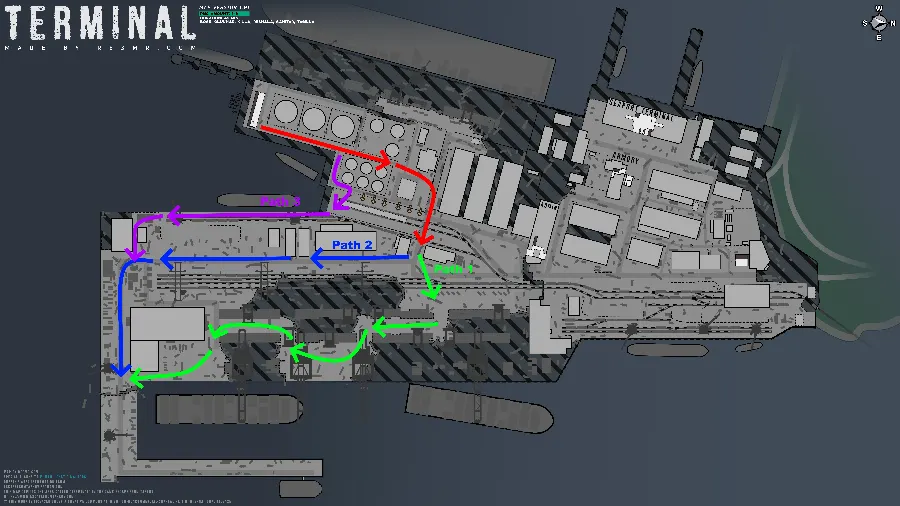
Possible paths to Pier door. 10Escape from Tarkov
Opening the pier door gives everyone in the raid three minutes to reach the Zubr Boat extraction at the end of the pier, after which it closes regardless of how much raid time is left. A last Black Division team stands between you and the boat. The extraction timer runs alongside that three minutes, and when it expires anyone inside the zone escapes and the cinematic for your chosen ending plays. Completing the raid earns you one of the game's endings; whether you die or extract, your character reverts to the state it was in before Terminal, apart from the access item you spent.

The extraction
Walkthrough facts and screenshots from the Escape from Tarkov Wiki (CC BY-SA), rewritten for this page.
2 Access the port Terminal
- Secure container Alpha-1 with TerraGroup evidence
3 Pass the security check
4 Locate the armory with your confiscated equipment
- Armory key
5 Obtain the keycard to unlock the service passage
- Black Division keycard
6 Access the Terminal loading zone
- Black Division keycard
7 Locate the way into the fuel depot
- SZ-1 explosive charge
8 Drain the water in the pumping station
9 Obtain the key to the gate blocking the road to the pier
- Pier door key
10 Escape from Tarkov
Requirements & Notes
Story chapter in Escape from Tarkov.
Required for Kappa container - NO


